How to Maintain HVAC Systems for Optimal Performance
Getting your HVAC system serviced often gets put in the too-hard basket. The funny thing is, neglecting basic maintenance can spike your energy bill by up to 30 percent and put your comfort on the line. Most people underestimate just how much difference a few simple steps can make to air quality and running costs.
Table of Contents
- Step 1: Gather Necessary Tools And Materials
- Step 2: Inspect And Clean Air Filters Regularly
- Step 3: Check And Clean Ductwork And Vents
- Step 4: Test And Calibrate Thermostats
- Step 5: Schedule Professional Inspections And Maintenance
Quick Summary
| Key Point | Explanation |
|---|---|
| 1. Assemble essential tools and materials | Collect tools like screwdrivers, multimeters, and protective gear to ensure safety and efficiency during HVAC maintenance tasks. |
| 2. Regularly inspect and clean air filters | Check and clean or replace air filters every 30 to 90 days to maintain system efficiency and indoor air quality. |
| 3. Maintain clean ductwork and vents | Inspect and clean ductwork and vents every six to twelve months to prevent dust accumulation and ensure optimal air distribution. |
| 4. Test and calibrate thermostats annually | Verify thermostat accuracy every 12 to 24 months using a thermometer, ensuring energy efficiency and comfortable temperatures. |
| 5. Schedule professional inspections biannually | Arrange for HVAC system checks twice a year to prevent major issues, improve efficiency, and ensure optimal operation during peak seasons. |
Step 1: Gather necessary tools and materials
Before diving into HVAC maintenance, assembling the right tools and materials will set you up for a smooth, efficient process. A well-prepared approach ensures you can tackle maintenance tasks confidently and safely.
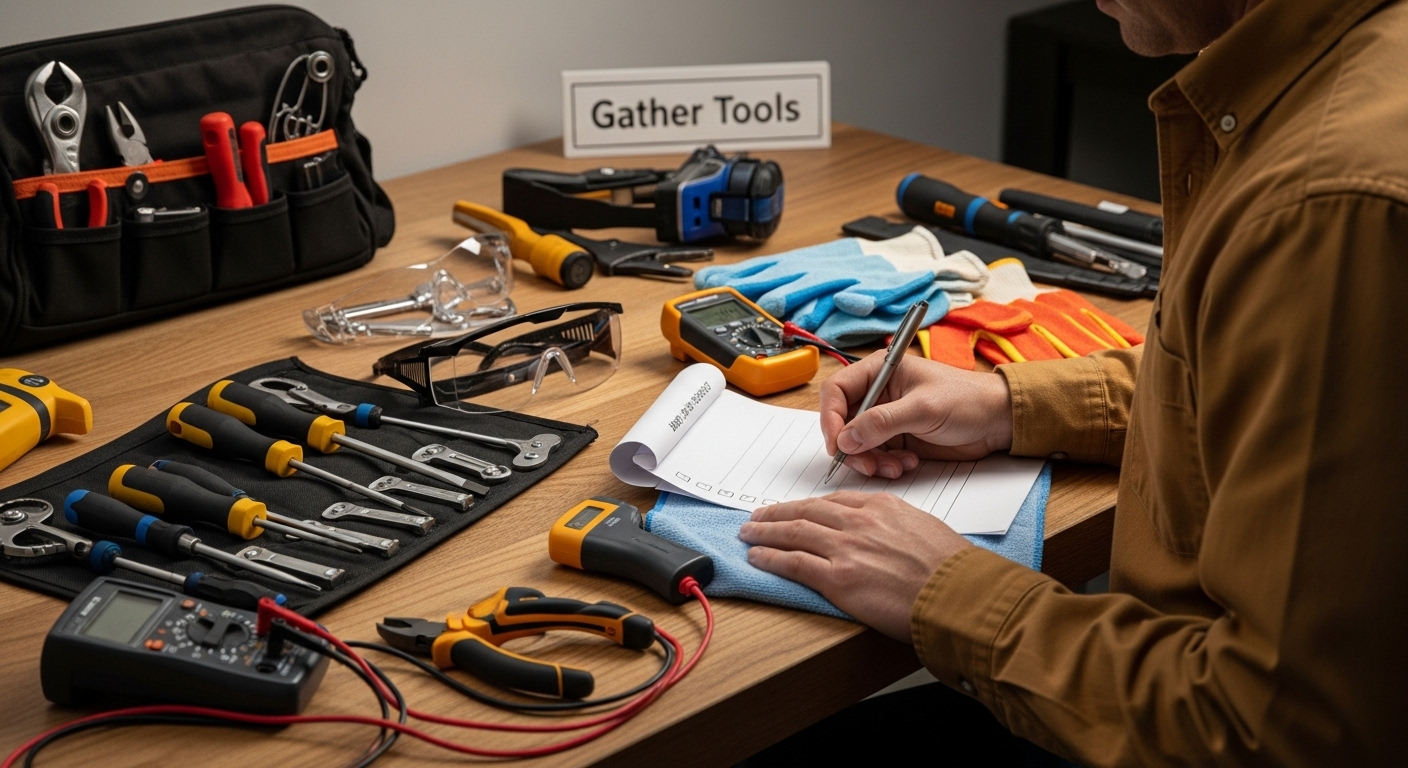
Start by collecting essential hand tools that are crucial for comprehensive HVAC system inspection and maintenance. Your toolkit should include a screwdriver set with multiple head types (flathead and Phillips), adjustable pliers, wire cutters, a multimeter for electrical testing, and a set of Allen wrenches. A reliable digital thermometer will help you accurately measure system performance and temperature differentials.
Protective equipment is equally important. Safety should always be your priority when working with electrical and mechanical systems. Gather insulated gloves, safety glasses, dust masks, and non-conductive footwear. These items protect you from potential electrical hazards, sharp edges, and dust or debris that might be present during maintenance.
For cleaning and maintenance, you will need several specialised materials. Collect microfibre cloths for delicate surface cleaning, compressed air for removing dust from internal components, a soft-bristled brush for gentle cleaning, and specific HVAC system cleaning solutions. According to the Australian Government’s YourHome maintenance guidelines, having the right cleaning materials can significantly extend your system’s operational lifespan.
Make sure you have a notepad and pen to document your observations during the maintenance process. Recording system performance, any unusual sounds, or visual irregularities will help track your HVAC system’s health over time.
The table below summarises the essential tools, materials, and their specific purposes when preparing for HVAC maintenance. Use this table to check you have everything on hand before getting started.
| Tool/Material | Specification/Example | Purpose |
|---|---|---|
| Screwdriver set | Flathead and Phillips, insulated handle | Remove vent covers, access panels, and system components |
| Adjustable pliers | Medium size, non-slip grips | Gripping and turning fasteners or connectors |
| Wire cutters | Insulated handles | Cutting or stripping electrical wires |
| Multimeter | Digital, with voltage and continuity settings | Testing electrical connections and troubleshooting faults |
| Digital thermometer | Accurate to 1°C, easy-to-read display | Checking temperature differentials and calibrating thermostat |
| Safety gear | Insulated gloves, safety glasses, dust mask | Protecting from electrical, dust, or debris hazards |
| Microfibre cloths | Lint-free, washable | Delicate surface cleaning |
| Compressed air canister | Handheld | Removing dust from internal components |
| Notepad and pen | Any type | Recording system performance and observations |
Finally, verify your toolkit is complete by checking each item off a prepared list. A well-organised approach ensures you won’t need to interrupt your maintenance workflow to fetch forgotten tools. With your tools and materials ready, you are prepared to move forward confidently with systematic HVAC maintenance.
Step 2: Inspect and clean air filters regularly
Air filters play a critical role in maintaining your HVAC system’s efficiency and indoor air quality. Regular inspection and cleaning prevent dust, allergens, and debris from compromising your system’s performance and spreading throughout your living or working space.
Begin by locating your system’s air filters. These are typically found near the return air duct or inside the indoor air handler unit. Turn off your HVAC system completely before attempting to remove or clean filters to ensure personal safety and prevent potential damage to the system. Carefully slide out the filter, taking note of its orientation and size for proper reinstallation.
Visually examine the filter for accumulated dust, debris, and discolouration. A clean filter should appear light in colour with visible mesh or pleating. If the filter looks dark, grey, or visibly clogged, it requires immediate cleaning or replacement.
According to Safe Work Australia’s guidelines on workplace ventilation, maintaining clean filters is essential for optimal air quality and system performance.
For reusable filters, use a vacuum cleaner with a soft brush attachment to gently remove loose dust and particles. If the filter is heavily soiled, rinse it under lukewarm running water, being careful not to damage the filter material. Allow the filter to dry completely before reinstalling to prevent mould growth. Disposable filters should be replaced entirely, matching the exact size and type recommended by your HVAC manufacturer.
When reinstalling the filter, ensure it is seated correctly with the airflow direction arrow pointing towards the air handler. Incorrect installation can reduce system efficiency and potentially cause damage. A clean filter not only improves air quality but also reduces strain on your HVAC system, potentially lowering energy consumption and extending the system’s operational lifespan.
![]()
To verify successful completion, check that the filter is clean, dry, and properly installed. Run your system briefly and listen for smooth airflow.
This table serves as a checklist to help you verify completion of key steps during air filter maintenance, ensuring your HVAC system remains efficient and safe.
| Step | What to Check | Verification Outcome |
|---|---|---|
| System power is OFF | Confirm system is deactivated | Safe for filter removal |
| Locate and remove filter | Note filter size and orientation | Filter removed without damage |
| Inspect filter condition | Check for blocking dust/debris | Filter is clean or needs action |
| Clean or replace filter | Use appropriate method | Cleaned (reusable) or replaced |
| Allow thorough drying (if washed) | Filter is dry to touch | Avoids mould or odours |
| Correct filter installation | Airflow arrow points to air handler | Ensures proper operation |
| Restore system power and test | Listen for smooth, unrestricted flow | Airflow normal and quiet |
Step 3: Check and clean ductwork and vents
Maintaining clean and unobstructed ductwork and vents is crucial for ensuring optimal HVAC system performance and indoor air quality. Accumulated dust, debris, and potential microbial growth can significantly impact your system’s efficiency and the air you breathe.
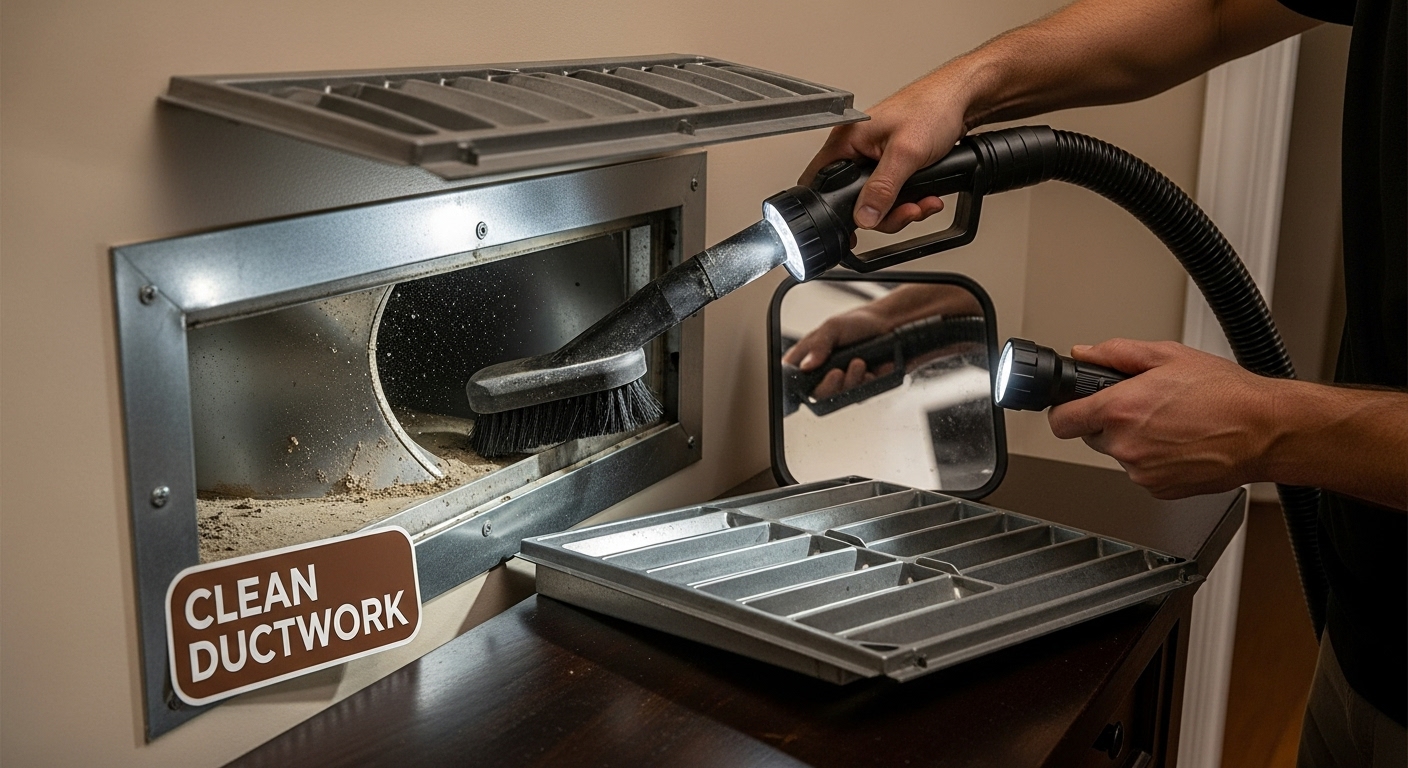
Begin by visually inspecting all accessible vent covers and registers throughout your space. Remove vent covers carefully using a screwdriver, taking care not to damage the surrounding surfaces. Use a flashlight to examine the interior of the ducts, looking for signs of dust buildup, debris, or potential damage such as small tears or loose connections. A small handheld mirror can help you see deeper into areas that are not immediately visible.
For initial cleaning, use a powerful vacuum with a long attachment hose and a brush head. Gently vacuum around the vent openings and as far into the ductwork as the attachment will reach. If you encounter significant dust or debris, consider using compressed air to dislodge stubborn particles, always directing the airflow towards the exterior of the building to prevent spreading contaminants.
According to WorkSafe Victoria’s guidelines on ventilation maintenance, regular inspection and cleaning of ductwork are essential for maintaining system efficiency and indoor air quality. For more thorough cleaning, you might need specialised tools or professional assistance, especially if you notice significant buildup or potential mould growth.
Check the duct connections and seals for any signs of air leakage. Visible gaps or loose connections can dramatically reduce your HVAC system’s efficiency, causing increased energy consumption and uneven temperature distribution. Small gaps can often be sealed using foil tape designed specifically for ductwork. For more extensive repairs, consult a professional HVAC technician.
After cleaning, reinstall the vent covers securely. To verify successful completion, run your HVAC system and check for improved airflow and reduced dust emission from the vents. A well-maintained duct system should provide consistent, clean air distribution with minimal noise and no visible dust expulsion. Consider performing this maintenance every six to twelve months, or more frequently in environments with high dust levels or ongoing renovation work.

Step 4: Test and calibrate thermostats
Thermostat calibration is a critical maintenance step that ensures your HVAC system operates with precision, maintaining consistent temperatures and maximising energy efficiency. An improperly calibrated thermostat can lead to unnecessary energy consumption and uncomfortable indoor environments.
Begin by gathering essential tools for accurate testing: a reliable digital thermometer, a small screwdriver, and potentially a multimeter. Start with a visual inspection of your thermostat, checking for any visible dust accumulation, loose mounting, or signs of wear. If you have a digital or smart thermostat, ensure the display is clear and functioning correctly.
To test accuracy, place your digital thermometer near the thermostat, ensuring it is at the same height and away from direct sunlight, drafts, or heat sources. Compare the temperature readings between your thermostat and the digital thermometer. A difference of more than 1-2 degrees Celsius indicates a need for recalibration. Some modern digital thermostats allow digital calibration through their menu settings, while older mechanical models might require manual adjustment.
According to the NSW Food Authority’s calibration guidelines, precision within 1C is crucial for accurate temperature measurement. For mechanical thermostats, this might involve carefully adjusting a calibration screw located behind the thermostat cover. Exercise extreme caution when performing this adjustment, making minimal turns and rechecking the temperature after each small adjustment.
Electrical thermostats require additional testing of their voltage and electrical connections. Use a multimeter to check the voltage at the thermostat terminals, ensuring they match the manufacturer’s specifications. Loose or corroded connections can cause inconsistent temperature readings and system performance. If you are uncertain about electrical testing, consult a professional HVAC technician.
Verify successful calibration by monitoring your HVAC system’s performance over several heating and cooling cycles. The system should maintain temperatures consistently within your set parameters, without frequent or prolonged cycling. Pay attention to any unusual sounds, temperature fluctuations, or increased energy consumption that might indicate ongoing calibration issues. Consider professional calibration if you cannot achieve consistent results through your own efforts. Regular thermostat calibration typically recommended every 12 to 24 months will help maintain your HVAC system’s optimal performance and energy efficiency.
Step 5: Schedule professional inspections and maintenance
Professional HVAC inspections represent the cornerstone of comprehensive system maintenance, providing expert assessment and preventative care that goes beyond typical homeowner capabilities. While personal maintenance is crucial, trained technicians can diagnose complex issues and ensure your system operates at peak efficiency.
Begin by researching qualified HVAC professionals in your local area. Look for technicians with current licensing, comprehensive insurance, and positive customer reviews. Prioritize professionals with experience in your specific HVAC system type and brand. When contacting potential service providers, request a detailed maintenance package that outlines their standard inspection procedures and what specific checks they will perform during the service.
A comprehensive professional inspection typically involves multiple critical evaluations. Technicians will thoroughly examine electrical connections, check refrigerant levels, inspect compressor and condenser unit performance, test system controls, and evaluate overall system efficiency. They will also identify potential wear and tear that might not be visible during your personal maintenance checks, helping prevent potential system failures before they occur.
According to the NSW Climate and Energy Action’s HVAC guide, professional inspections can lead to significant energy savings. Aim to schedule these inspections twice annually: once before the cooling season and once before the heating season. This biannual approach ensures your system is prepared for peak performance during extreme temperature periods.
During the inspection, engage with the technician and request a detailed report of their findings. Ask questions about any recommended repairs or potential future maintenance requirements. A good technician will not only fix immediate issues but also provide insights into your system’s long-term health and potential efficiency improvements. Request a written report that you can keep for your records, which will help track your HVAC system’s maintenance history.
Verify the inspection’s success by reviewing the technician’s report, checking system performance immediately after service, and monitoring energy efficiency over subsequent months. Look for smoother system operation, more consistent temperatures, and potentially reduced energy consumption. Keep all maintenance documentation, as these records can be valuable for warranty purposes and future system assessments. By investing in professional inspections, you’re protecting your HVAC system’s longevity and ensuring optimal performance throughout its operational life.
Optimise Your HVAC System with Local Experts You Can Trust
You have just read about the essential steps for keeping your HVAC system running smoothly. From cleaning air filters to professional inspections, the process can feel overwhelming and time-consuming. Missteps like overlooked ductwork or incorrectly calibrated thermostats can impact comfort, air quality, and running costs. Many homeowners and businesses struggle to stay on top of regular HVAC care and worry about missing critical maintenance that affects efficiency or causes expensive breakdowns.
Turn your maintenance checklist into lasting peace of mind with help from Brisbane’s trusted specialists. At Hart Air Conditioning & Refrigeration, our licensed team delivers thorough servicing and repairs for both residential and commercial HVAC systems. We know the ins and outs of filter checks, duct cleaning, and precise thermostat calibration. Let us safeguard your investment and create a healthier, more comfortable indoor environment for you. Book your tailored maintenance with Hart Air Conditioning & Refrigeration today and experience the difference of expert, personalised service right when you need it most.
Frequently Asked Questions
How often should I check and clean my HVAC system’s air filters?
You should check and clean air filters every 30 to 90 days, depending on your specific environment and manufacturer recommendations. Regular maintenance of filters helps improve air quality and system efficiency.
What tools do I need for basic HVAC maintenance?
Essential tools for HVAC maintenance include screwdrivers, adjustable pliers, wire cutters, a multimeter, a digital thermometer, and cleaning supplies such as microfibre cloths and a vacuum with a brush attachment.
How can I tell if my HVAC thermostat is calibrated correctly?
To check the calibration of your thermostat, compare its reading with that of a reliable digital thermometer placed nearby. If there is a difference of more than 1-2 degrees Celsius, recalibration may be necessary.
Why is professional inspection important for HVAC systems?
Professional inspections are important because they provide expert assessment and preventative care, diagnosing complex issues that homeowners might miss. Scheduling these inspections biannually ensures your system operates efficiently and can lead to significant energy savings.

